Unity & C# 学習教材
Input System で入力操作
プレイヤーのキーボード入力を受け取るには、Unity の Input System を使います。このページでは、キー入力の判定方法と、Update メソッド内で入力を処理する理由を学びます。
前提: このページでは Input System パッケージがプロジェクトに導入・設定済みであることを前提とします。
学習目標
このページを読み終えると、以下のことができるようになります。
Keyboard.currentでキーボードの状態を取得できるisPressedとwasPressedThisFrameの使い分けができる- Update 内で入力を処理する理由を説明できる
- 入力に応じてオブジェクトを動かせる
前提知識
- Update メソッドと連続実行 を読んでいること
1. Input System とは
Unity には入力を扱うパッケージとして Input System があります。キーボード・マウス・ゲームパッドなど、さまざまなデバイスの入力を統一した方法で扱えます。
Input System の機能を使うには、スクリプトの先頭に using ディレクティブを追加します。
1
using UnityEngine.InputSystem;
2. Keyboard.current でキー入力を取得する
Keyboard.current — 現在アクティブなキーボードデバイスを取得します。
書式:Keyboard.current プロパティ
1
public static Keyboard current { get; }
Keyboard.current からは、キーごとのプロパティを通じて各キーの状態にアクセスします。たとえば →キー に対応する rightArrowKey は次のように定義されています。
Keyboard.rightArrowKey — →キーの入力状態を表す ButtonControl を返します。
書式:Keyboard.rightArrowKey プロパティ
1
public ButtonControl rightArrowKey { get; }
戻り値の型が ButtonControl であることに注目してください。Keyboard が持つキープロパティはすべて ButtonControl 型です。代表的なものを以下に示します。
| プロパティ | 対応するキー |
|---|---|
rightArrowKey |
→ |
leftArrowKey |
← |
upArrowKey |
↑ |
downArrowKey |
↓ |
spaceKey |
Space |
enterKey |
Enter |
escapeKey |
Escape |
ButtonControl 型は、キーの押下状態を調べるための以下のプロパティを持っています。
ButtonControl.isPressed — そのキーが現在押されているかどうかを返します。
ButtonControl.wasPressedThisFrame — そのキーがこのフレームで初めて押されたかどうかを返します。
書式:ButtonControl のプロパティ
1
2
public bool isPressed { get; }
public bool wasPressedThisFrame { get; }
使用例(→キーの場合)
1
2
Keyboard.current.rightArrowKey.isPressed           // 押している間ずっと true
Keyboard.current.rightArrowKey.wasPressedThisFrame  // 押した瞬間の1フレームだけ true
| プロパティ | true になるタイミング |
用途の例 |
|---|---|---|
isPressed |
キーを押している間ずっと | 移動・継続的な操作 |
wasPressedThisFrame |
キーを押した瞬間の1フレームのみ | ジャンプ・攻撃など単発の操作 |
3. Update 内で入力を処理する理由
入力の判定は Update 内に書きます。Start に書くとゲーム開始時の1フレームしか判定されないため、プレイヤーのリアルタイムな操作に応答できません。
1
2
3
4
5
6
7
8
9
10
11
12
13
using UnityEngine;
using UnityEngine.InputSystem;
public class InputSample : MonoBehaviour
{
private void Update()
{
if (Keyboard.current.rightArrowKey.isPressed)
{
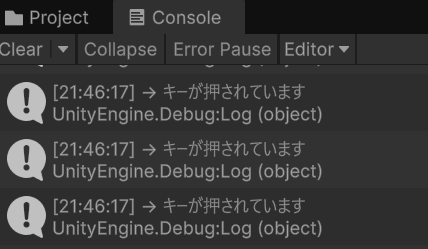
Debug.Log("→ キーが押されています");
}
}
}
4. 入力に応じてオブジェクトを動かす
前のページで学んだ Translate と Time.deltaTime と組み合わせて、キー入力でオブジェクトを移動させます。
1
2
3
4
5
6
7
8
9
10
11
12
13
14
15
16
17
18
using UnityEngine;
using UnityEngine.InputSystem;

public class InputSample : MonoBehaviour
{
    private void Update()
    {
        if (Keyboard.current.rightArrowKey.isPressed)
        {
            transform.Translate(Vector3.right * 5.0f * Time.deltaTime);
        }

        if (Keyboard.current.leftArrowKey.isPressed)
        {
            transform.Translate(Vector3.left * 5.0f * Time.deltaTime);
        }
    }
}
→ キーを押している間だけ右へ、← キーを押している間だけ左へ移動します。
💡 ポイント: コード内の
5.0fは1秒あたりの移動速度です。値を変えるだけで速度を調整できますが、同じ数値が複数箇所に散らばると管理しにくくなります。次のページでこの問題を解決します。
ワンポイントアドバイス
Input System が登場する以前、Unity では Input クラス と InputManager が入力の主役でした。Input.GetKey(KeyCode.RightArrow) のような書き方で、追加パッケージなしにキー入力を扱うことができ、多くのプロジェクトを長年にわたって支えてきた実績ある仕組みです。現在も動作しますが、新規プロジェクトでは Input System が推奨されています。
詳しくは 補足: 旧来の Input クラスと InputManager を参照してください。
よくあるミス
1
2
3
4
5
// ❌ NG: using ディレクティブがないとコンパイルエラーになる
if (Keyboard.current.spaceKey.isPressed) { }

// ✅ OK: ファイルの先頭に using を追加する
using UnityEngine.InputSystem;
まとめ
- Input System を使うには
using UnityEngine.InputSystem;が必要 Keyboard.current.キー名.isPressedで押している間を判定できるwasPressedThisFrameは押した瞬間だけtrueになる- 入力処理は
Update内に書く
理解度チェック
以下の問いに答えられるか確認しましょう。
isPressedとwasPressedThisFrameはどう使い分けますか?- 入力判定を
Startに書くとどうなりますか? - スペースキーが押された瞬間だけ処理を実行するにはどう書きますか?
解答を見る
- 押している間ずっと処理したい場合は
isPressed、押した瞬間だけ処理したい場合はwasPressedThisFrameを使う。 - ゲーム開始時の1フレームしか判定されず、プレイヤーの入力に応答できない。
-
1
2
3
4
if (Keyboard.current.spaceKey.wasPressedThisFrame)
{
    // 処理
}
次のステップ
フィールドでデータを維持する では、速度などのパラメータをフィールドで管理し、Inspector から調整できるようにする方法を学びます。